

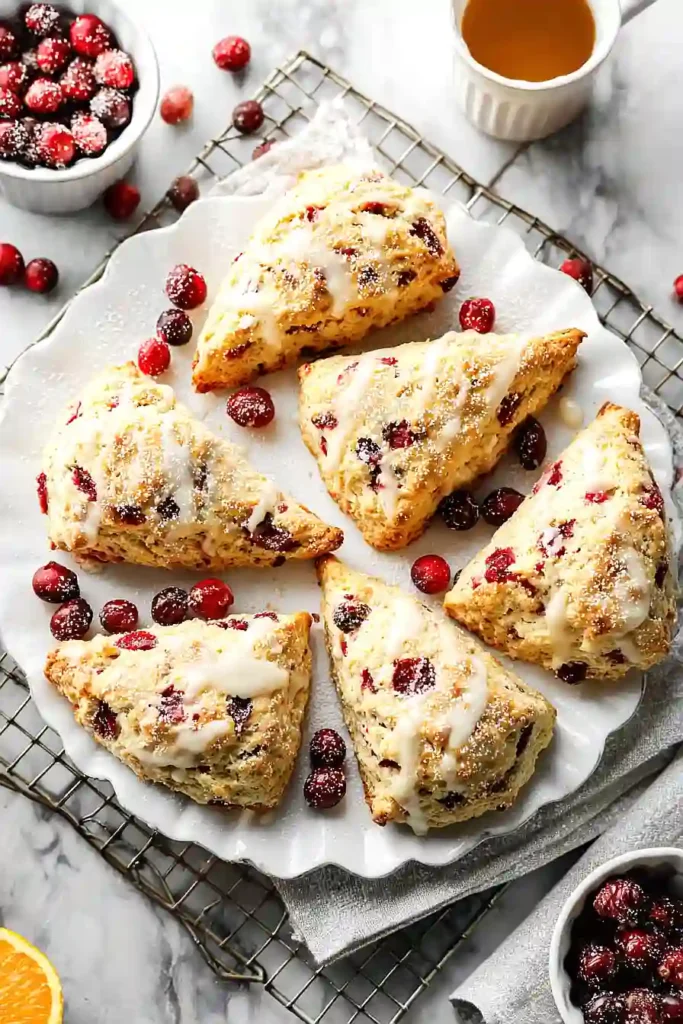
Cranberry Orange Scones
September 28, 2025 by zingle560@gmail.com
Master the ancient art of proper scone-making with modern precision
The Essence of Scone Mastery
A perfect scone exists at the intersection of technique and restraint. It’s not merely a quick bread or a dense biscuit—it’s a carefully orchestrated balance of fat, flour, and liquid that creates layers of flaky tenderness. The cranberry-orange combination represents more than flavor pairing; it’s a lesson in managing moisture, acidity, and sweetness within a delicate pastry structure.
Understanding scones means understanding the science of lamination without the complexity of croissants, the precision of pastry without the intimidation of pâte brisée.
Total Commitment: 35 minutes | Active Hands-On: 15 minutes
Yield: 8 elegant wedges | Skill Building: Foundation pastry techniques
Essential Wisdom: Temperature control determines everything
Deconstructing the Formula
The Structural Foundation
- 2 cups all-purpose flour – Your canvas, providing both structure and tenderness when handled properly
- 2½ tsp baking powder – The lifting agent that creates height and lightness
- ½ tsp salt – Enhances flavor and strengthens gluten structure
- 6 tbsp white sugar – Balances tartness while promoting browning
The Layering Agent
- ½ cup unsalted butter, frozen solid – This isn’t optional temperature guidance; frozen butter creates distinct pockets that steam into flaky layers
The Binding Complex
- ⅓ cup sour cream – Provides tang and tenderness through acidity
- ⅓ cup heavy cream – Richness and moisture
- 1 large egg – Structure and richness
- 1 tsp vanilla extract – Aromatic complexity
- Zest of 1 orange – Essential oils that permeate every bite
The Flavor Elements
- 1 cup fresh cranberries, halved – Tart bursts that contrast the rich pastry
- Finishing cream for brushing – Creates golden, bakery-worthy tops
The Crowning Touch
- ⅔ cup confectioners’ sugar – Silky sweetness for the glaze
- 1 tbsp fresh orange juice – Brightens and binds the glaze
The Science Behind Superior Scones
Understanding Fat Distribution
Frozen butter isn’t a convenience—it’s a technique. When you grate frozen butter directly into flour, you create irregular pieces that remain cold longer. As these pieces melt in the oven, they create steam pockets that separate layers of dough, resulting in flakiness.
Room temperature butter would blend too thoroughly with flour, creating a cake-like texture instead of the desired layered structure. This principle applies to all laminated pastries, from croissants to rough puff pastry.
The Cranberry Preparation Protocol
Halving fresh cranberries serves multiple purposes beyond aesthetics. Whole berries create large pockets in the dough that can cause structural failure. Halved berries distribute more evenly while still providing distinct flavor bursts. Tossing them lightly in flour before incorporating prevents them from sinking during baking—the flour coating helps suspend them throughout the dough.
The Critical Non-Mixing Principle
Scone dough should look shaggy and barely cohesive when properly mixed. Overworking develops gluten strands that create toughness. The goal is hydration, not smoothness. The dough will come together during shaping, and any remaining dry patches will absorb moisture during the resting period.
The Methodical Process
Phase 1: Environmental Preparation
Preheat your oven to 400°F—this high heat is essential for proper rise and browning. Line your baking sheet with parchment, not just for easy removal, but because it provides gentle insulation that prevents bottom burning.
Ensure your butter is frozen solid. If it’s merely cold, put it in the freezer for 15 minutes while you prepare other ingredients. This step cannot be compromised.
Phase 2: Dry Ingredient Integration
Whisk your flour, sugar, baking powder, and salt thoroughly. This isn’t just combining—you’re aerating the flour and ensuring even distribution of leavening agents. Uneven baking powder distribution creates irregular rise patterns.
Phase 3: The Butter Integration Dance
Using the large holes of a box grater, grate the frozen butter directly into the flour mixture. Work quickly—your hands will warm the butter. Use a pastry cutter or two knives to cut the butter into the flour until the mixture resembles coarse meal with some pea-sized pieces remaining.
Place this mixture in the refrigerator while you prepare wet ingredients. This step maintains temperature control and gives the flour time to absorb any butter that began to soften during grating.
Phase 4: Wet Component Assembly
In a separate bowl, whisk together sour cream, heavy cream, egg, vanilla, and orange zest until completely uniform. The orange zest needs thorough distribution—uneven zest means uneven flavor.
Phase 5: The Critical Combination
Remove your flour-butter mixture from the refrigerator. Make a well in the center and pour in the wet ingredients. Using a fork or your hands, gently stir from the outside toward the center, just until the mixture begins to hold together.
Add the halved cranberries and fold them in with minimal additional mixing. The dough should look rough and slightly dry—this is correct.
Phase 6: Shaping Without Overworking
Turn the shaggy dough onto a lightly floured surface. With floured hands, gently press it together into a cohesive mass. Don’t knead—simply press and gather until it holds together.
Pat the dough into a circle approximately 8 inches across and 1 inch thick. Use a bench scraper or sharp knife to cut into 8 equal wedges. Clean cuts are essential—twisting or dragging the knife seals the edges and prevents proper rising.
Phase 7: The Final Preparation
Transfer wedges to your prepared baking sheet, spacing them at least 1 inch apart. Brush the tops with heavy cream—this creates the golden, professional appearance and adds richness to the top crust.
Phase 8: The Baking Transformation
Bake for 15-18 minutes, watching for golden brown tops and firm structure. The scones should sound hollow when tapped gently on the bottom. Internal temperature should reach 190°F if you want to be precise.
Remove from the baking sheet immediately to prevent bottom steaming. Cool on a wire rack for at least 10 minutes before glazing—hot scones will melt the glaze immediately.
The Glaze Artistry
Consistency Mastery
The glaze should fall from a spoon in a thick ribbon that disappears back into the mixture within 2-3 seconds. Too thin, and it disappears into the scone; too thick, and it sits on top without adhering properly.
Start with the suggested ratio, then adjust gradually. Add orange juice by the teaspoon if too thick, or confectioners’ sugar by the tablespoon if too thin.
Application Technique
Drizzle the glaze using a fork or small spoon, creating irregular patterns rather than trying for perfect coverage. The natural, rustic appearance is part of the scone’s charm.
Troubleshooting Common Failures
Dense, Heavy Scones
Cause: Overworked dough or room-temperature butter
Solution: Handle dough minimally; ensure butter is frozen
Crumbly, Falling-Apart Texture
Cause: Insufficient moisture or over-flouring
Solution: Add liquid gradually; use minimal flour during shaping
Uneven Rising
Cause: Uneven baking powder distribution or dull cutting tool
Solution: Thorough dry ingredient whisking; sharp, clean cuts
Soggy Bottoms
Cause: Baking sheet too thin or oven temperature too low
Solution: Use heavy baking sheet; verify oven temperature with thermometer
Customization Strategies
Seasonal Variations
- Spring: Replace cranberries with chopped strawberries and lemon zest
- Summer: Fresh blueberries with lime zest
- Fall: Diced apple with cinnamon
- Winter: Candied ginger with additional orange zest
Dietary Modifications
- Gluten-free: Replace all-purpose flour with gluten-free blend (add 1 tsp xanthan gum if not included)
- Dairy-free: Substitute coconut cream and vegan butter
- Lower sugar: Reduce sugar to 3 tablespoons and omit glaze
Texture Alternatives
- Heartier: Replace ½ cup flour with whole wheat flour
- Richer: Add 2 tablespoons cream cheese to wet ingredients
- More tender: Replace 2 tablespoons flour with cornstarch
Storage and Service Excellence
Immediate Service
Serve scones within 2 hours of baking for optimal texture. They pair beautifully with clotted cream, butter, or high-quality preserves.
Short-term Storage
Store in airtight container at room temperature for up to 3 days. For best texture, warm in 300°F oven for 5-8 minutes before serving.
Long-term Preservation
Freeze baked scones for up to 3 months. Wrap individually in plastic wrap, then store in freezer bags. Thaw at room temperature and refresh in warm oven.
Make-Ahead Strategy
Shape unbaked scones and freeze on a baking sheet. Once solid, transfer to freezer bags. Bake directly from frozen, adding 3-4 minutes to baking time.
The Broader Lesson
Mastering scones teaches fundamental pastry principles: temperature control, minimal mixing, fat distribution, and the delicate balance between structure and tenderness. These skills transfer directly to biscuits, rough puff pastry, and other laminated doughs.
More importantly, scones teach patience and restraint—qualities that define excellent baking. The urge to “fix” a shaggy dough or perfectly smooth a rough surface must be resisted. Sometimes, apparent imperfection leads to superior results.
This recipe isn’t just about cranberry orange scones; it’s about understanding the science and art behind one of baking’s most elegant forms. Once these principles become intuitive, you’ll find yourself creating variations and adaptations with confidence, guided by understanding rather than rigid rule-following.
The true success isn’t just in producing delicious scones—it’s in developing the baker’s intuition that will serve you across countless future baking adventures.